


Introduction
Waveform is a way of representing sound.
In this article, we are going to see how we can get the data needed to draw these waveforms, in a Flutter app.
For this we are going to use a tool named FFmpeg.
What is FFmpeg?
FFmpeg is a cross-platform command line used to encode and decode video. It's a very powerful tool and one of the most complex command lines I've ever used.
In this article, we are going to use it to get the data needed to draw a waveform.
To use it in Flutter, we are going to use the ffmpeg_kit_flutter.
This plugin only works on Android, iOS and macOS.
But isn't FFmpeg a "cross-platform" tool ?
Yeah, but the implementation isn't currently done. You can read this GitHub issue about this topic.
What kind of data do we need?
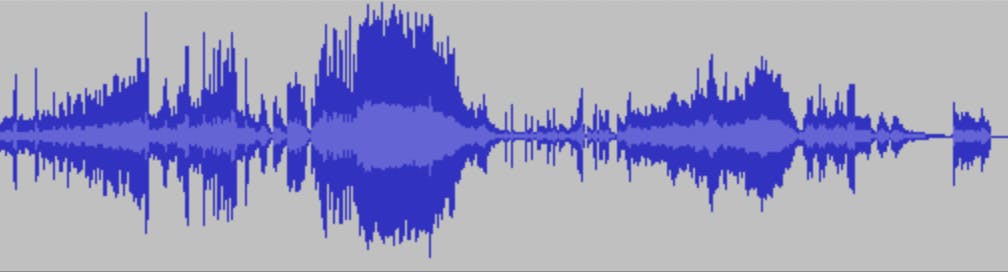
Waveforms represent sound. More accurately, it represents the loudness of a sound. If it's near zero (the center of the graph), that means the sound is very quiet.
So this

Means the sound isn't very loud.
And this
Means the sound is very loud.
We can accomplish this in many ways.
In our case, we are going to use the peak level of the signal in dBFS. Peak level, highlight the maximum value.
If you want to show more nuance in your waveform, you should use the RMS level, more info about this topic in this article
How do we get the peak level of a sound with FFmpeg?
First thing, to get the peak level of a sound, you need a file containing the sound data.
In this article, we are going to use a cymbal sound
Fetching the file
For our example, we are going to put our cymbal sound file inside the app assets folder.
  assets:
    - assets/cymbal.wav
Then we can get the file like this in our app:
Future<File> getAudioFileFromAssets() async {

  final byteData = await rootBundle.load('assets/cymbal.wav');

  final file = File('${(await getTemporaryDirectory()).path}/cymbal.wav');
  await file.writeAsBytes(byteData.buffer
      .asUint8List(byteData.offsetInBytes, byteData.lengthInBytes));

  return file;
}
It gives us a File object. Now we can use it to retrieve the information we want
Getting data from the file
Now that we have our file, we can retrieve the data.
We are going to use FFprobe. FFprobe is a part of the FFmpeg project and it's used to get information from multimedia streams.
Here is the final command line we want to use:
ffprobe -v error -f lavfi -i amovie=/path/to/cymbal.wav,astats=metadata=1:reset=1 -show_entries frame_tags=lavfi.astats.Overall.Peak_level -of json
This is pretty intense, so I will explain it.
The -f lavfi option define a complex filtergraph.
The -v error specifies the log level and the -of json specifies that we want the output in json format.
Finally, the most interesting parts.
amovie=/path/to/cymbal.wav,astats=metadata=1:reset=1 -show_entries frame_tags=lavfi.astats.Overall.Peak_level
This is what we pass to the -i parameter. The -i parameter specifies the input data. Here with amovie we tell ffprobe that we will use an audio input.
The astats part is where the magic happens. We tell ffprobe to display information about the audio channel. The metadata and reset parameters are mandatory. metadata sets up the metadata injection, which defines the number of channels. reset defines the number of frames over which cumulative stats are calculated before being reset. By default, in ffmpeg an audio frame regroups 1024 samples.
If you want to change this number you can pass the
asetnsamplesto define how many samples should contain an audio frame. So if you setasetnsamplesparameter to the audio file sample rate (usually 44.1kHz or 48kHz), you will fetch data every second.All of this might sound complicated, here are some links to have a better understanding of what it is all about: https://sound.stackexchange.com/questions/41567/difference-between-frame-and-sample-in-waveform | https://stackoverflow.com/questions/3957025/what-does-a-audio-frame-contain#:~:text=An%20audio%20frame%2C%20or%20sample,44%2C100%20frames%2Fsamples%20per%20second.
We are setting metadata and reset parameters to 1. In most cases, this is what we want.
Finally, -show_entries frame_tags=lavfi.astats.Overall.Peak_level is what tells ffprobe to display the peak level information of the file. You can display a good deal of other information, just check the documentation
Implementation in Flutter
Now that we know what we are going to do, let's start the fun part.
We are going to use the ffmpeg_kit_flutter to execute our command. It works like this:
FFprobeKit.executeAsync(command, () {
  callback executed when the command is done
});
FFprobeKit is the entry point of the FFprobe part of the plugin. In this example, we execute The executeAsync method to execute a FFprobe command asynchronously.
The result of the command is accessible from a FFprobeSession object. There are two ways of getting a FFprobeSession object. We can await the executeAsync method, or we can execute a callback when the FFprobe command is done.
Both work. In this article, we are going to register a callback when the command is done.
Here is the final code:
Future<List<double>> fetchDataFromFile(File audioFile) async {
  final audioFilePath = audioFile.path;

  final _completer = Completer<List<double>>();

  await FFprobeKit.executeAsync(
      "-v error -f lavfi -i amovie=$audioFilePath"
      ",astats=metadata=1:reset=1 -show_entries"
      " frame_tags=lavfi.astats.Overall.Peak_level -of json",
      (session) async {
    final returnCode = await session.getReturnCode();
    final output = await session.getOutput();

    if (ReturnCode.isSuccess(returnCode)) {
      _completer.complete(_outputToList(output));
    } else {
      _handleFailure(returnCode: returnCode, completer: _completer);
    }
  });

  return _completer.future;
}
As you can see we are using a Completer object to return data when our callback is executed.
When the FFprobe command is done, we get the return code and the output. We did a simple check to see if it was successful. If it's not, we execute the _handleFailure function:
void _handleFailure({
    required ReturnCode? returnCode,
    required Completer<List<double>?> completer,
  }) {
    if (ReturnCode.isCancel(returnCode)) {
      print("ffprobe commande canceled");
      completer.complete(null)
    } else {
      final e = Exception("command fail");
      completer.completeError(e);
    }
  }
In this function, we just check that it is really a failure, and if that is the case, we make our Completer object complete with an error.
If the command is successful, we complete our Completer object with the result of the _outputToList function:
List<double> _outputToList(String? output) {
    if (output == null || output.isEmpty) {
      throw Exception("No data");
    }

    try {
      final parsedOutput = jsonDecode(output);
      final frameData = parsedOutput["frames"] as List;
      return frameData
          .map<double?>((e) {
            try {
              return (double.parse(e["tags"]["lavfi.astats.Overall.Peak_level"] as String));
            } catch (e) {
              return null;
            }
          })
          .whereType<double>()
          .toList();
    } on Exception catch (_) {
      throw Exception("Parsing failed");
    }
  }
In this function, we make sure that we have data in the output. If this is not the case, we raise an exception. Then, we try to parse the data. If the parsing fails at some point, again we raise an exception. And if everything is fine we parse the output and create a List<double> object out of it.
Here’s a short sample of the data we get with our cymbal sound file:
Cymbal sound peak level:
-0.409556
-0.099999
-1.481092
-4.157582
-4.091515
-5.026431
-6.185354
-6.70617
-7.72662
-7.750185
-7.882804
-8.599196
-10.24849
-10.57842
-10.160495
-9.912185
-10.668357
-11.534391
-11.89096
-11.727936
-11.59894
...
Conclusion
Ok, we now know how to use FFprobe to get data to draw waveforms. In the near future, I will write an article to show how we can draw waveforms based on this data.
Also, I made a plugin
That draws waveforms from files. It is currently still a work in progress, but you can check it out if you are interested in the topic.