

Introduction
Flavors are a way of creating different environments for our application. It allows us to specify the app configuration for each of our cases. For example, we want to create a development flavor that is going to use different API endpoints than the production flavor which will be available to customers. Flutter makes it easy, we will see how, but there is currently no out-of-the-box solution inside Flutter itself. Thanks to the awesome Flutter community, there are some pretty good packages on pub.dev to make our life easier. In this post, we will see how to set flavors to a Flutter application. Then we are going to see how we can get the best out of these flavors. We will see how it simplifies the CI/CD and how we can configure VsCode to run each flavor from the interface.
Demo App
To demonstrate the power of flavors, we are going to create a small, useless app that is only going to display its boring information (app name, package name) using package_info_plus and a GIF, which will be different for each flavor.
You can find the repo on github
The code of the main.dart file looks like this:
import 'dart:async';

import 'package:flavors_demo/flavors.dart';
import 'package:flutter/material.dart';
import 'package:package_info_plus/package_info_plus.dart';

void main() {
  runApp(const MyApp());
}

class MyApp extends StatelessWidget {
  const MyApp({Key? key}) : super(key: key);

  @override
  Widget build(BuildContext context) {
    return MaterialApp(
      title: 'Flavors Demo',
      theme: ThemeData.dark(),
      home: const MyHomePage(title: 'Flavors Demo'),
    );
  }
}

class MyHomePage extends StatefulWidget {
  const MyHomePage({Key? key, required this.title}) : super(key: key);

  final String title;

  @override
  _MyHomePageState createState() => _MyHomePageState();
}

class _MyHomePageState extends State<MyHomePage> {
  PackageInfo _packageInfo = PackageInfo(
    appName: 'Unknown',
    packageName: 'Unknown',
    version: 'Unknown',
    buildNumber: 'Unknown',
  );

  @override
  void initState() {
    super.initState();
    _initPackageInfo();
  }

  Future<void> _initPackageInfo() async {
    final info = await PackageInfo.fromPlatform();
    setState(() {
      _packageInfo = info;
    });
  }

  Widget _infoTile(String title, String subtitle) {
    return ListTile(
      title: Text(title),
      subtitle: Text(subtitle.isEmpty ? 'Not set' : subtitle),
    );
  }

  @override
  Widget build(BuildContext context) {
    return Scaffold(
      appBar: AppBar(
        title: Text(widget.title),
      ),
      body: ListView(
        children: <Widget>[
          _infoTile('App name', _packageInfo.appName),
          _infoTile('Package name', _packageInfo.packageName),
          Image.network(
            "https://media.giphy.com/media/s9ijJ0AI4JKko/giphy.gif",
          ),
        ],
      ),
    );
  }
}
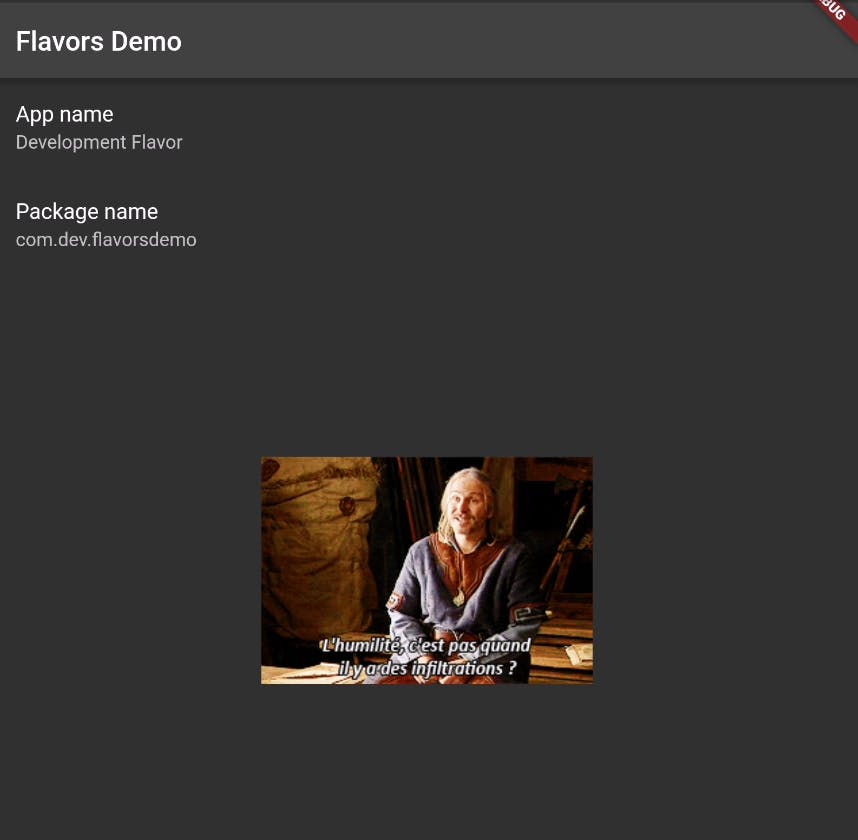
Nothing much is happening here, just displaying some app info and an Image from a classic french TV show. The result look like this:
Now we are going to add 3 flavors to our app. One for development, another one for staging, and finally, one for production.
Setting up flavors
Configuring flavors is mostly done by setting up some config files in the Android and iOS folder. It's from my point of view, not really the most exciting part of creating an app, but thanks to the community, some have created tools to make this part easier. In this article, we are going to focus on flutter_flavorizr.
At the time I am writing this article, the latest version (2.1.2) isn't compatible with the
integration_testpackage. So if you want to use this package and still write integration tests, you should add the following line to your pubspec.yaml fileflutter_flavorizr: <2.1.2.
Once installed, we can add the following lines to our pubspec.yaml file.
flavorizr:
  ide: "vscode"
  app:
    android:
      flavorDimensions: "flavor-type"
    ios:

  flavors:
    development:
      app:
        name: "Development Flavor"

      android:
        applicationId: "com.dev.flavorsdemo"

      ios:
        bundleId: "com.dev.flavorsdemo"
        buildSettings:
          # Development Team is visible in the apple developer portal
          DEVELOPMENT_TEAM: YOURDEVTEAMID
          PROVISIONING_PROFILE_SPECIFIER: "Dev-ProvisioningProfile"

    staging:
      app:
        name: "Staging App"

      android:
        applicationId: "com.staging.flavorsdemo"
      ios:
        bundleId: "com.staging.flavorsdemo"
        buildSettings:
          DEVELOPMENT_TEAM: YOURSTAGINGTEAMID
          PROVISIONING_PROFILE_SPECIFIER: "Staging-ProvisioningProfile"

    production:
      app:
        name: "Production App"

      android:
        applicationId: "com.production.flavorsdemo"
      ios:
        bundleId: "com.production.flavorsdemo"
        buildSettings:
          DEVELOPMENT_TEAM: YOURPRODUCTIONTEAMID
          PROVISIONING_PROFILE_SPECIFIER: "Production-ProvisioningProfile"
What's happening ?
The first config we see is the flavorDimensions for Android. This is to create complex flavors that can combine with each other. Note that the value flavor-type is the default, and this is what we want in most cases. If you want to read about this topic, here is the documentation
Next we can see our array of flavors. In our case we have defined 3 flavors, development, staging and production. Each of these flavors has a different app name, a different applicationId for Android and different bundleId/buildSettings for iOS.
Other config
There are more configurations we can add. First, if you have already configured app icons with flutter_launcher_icons, you can add generateDummyAssets to false. This will prevent flutter_flavorizr to create dummy assets for each of your flavors.
If you want to set a different icon for each of your flavors, you can do that with flutter_launcher_icons. flutter_flavorizr also has this feature, just add the icon field and set it to the path of the desired icon. For example:
  flavors:
    development:
      app:
        name: "Development Flavor"

      android:
        applicationId: "com.dev.flavorsdemo"
        icon: "assets/path-to-your-icon"


      ios:
        bundleId: "com.dev.flavorsdemo"
        buildSettings:
          # Development Team is visible in the apple developer portal
          DEVELOPMENT_TEAM: YOURDEVTEAMID
          PROVISIONING_PROFILE_SPECIFIER: "Dev-ProvisioningProfile"
        icon: "assets/path-to-your-icon"
You can also add a configuration related to Firebase. Check the documentation for more info about that
There is an IDE field to configure your IDE. But we will see that later.
Create flavors
Now that we have our flavors set up, we can create them! For that run the command flutter pub run flutter_flavorizr. This will create all the configuration files for Android and iOS. It will also generate dart files. Let's see what they are used for
flavors.dart
You can see this file like a .env file, but with more power because it's a dart file. It's pretty simple, you have an enum named Flavor and this enum has 3 possible values (each for one of your defined flavors). Now, to fetch a specific value for one flavor, we create a static method. Here is the generated default file:
enum Flavor {
  DEVELOPMENT,
  STAGING,
  PRODUCTION,
}

class F {
  static Flavor? appFlavor;

  static String get name => appFlavor?.name ?? '';

  static String get title {
    switch (appFlavor) {
      case Flavor.DEVELOPMENT:
        return 'Development Flavor';
      case Flavor.STAGING:
        return 'Staging App';
      case Flavor.PRODUCTION:
        return 'Production App';
      default:
        return 'title';
    }
  }

}
To define an env variable, we add something like this in our flavors file:
  static String get memeUrl {
    switch (appFlavor) {
      case Flavor.DEVELOPMENT:
        return "https://media.giphy.com/media/s9ijJ0AI4JKko/giphy.gif";
      case Flavor.STAGING:
        return "https://media.giphy.com/media/XknChYwfPnp04/giphy.gif";
      case Flavor.PRODUCTION:
        return "https://media.giphy.com/media/zrCSvFfl2fP7W/giphy.gif";
      default:
        throw Exception("Unknown flavor for memeUri");
    }
  }
We just define an env variable. Now we can use it in our app like this:
Image.network(F.memeUrl)
You might be asking yourself "but how is my app going to know what flavor to use?". This is our next step.
main-flavor.dart
In order to know which flavor to use, we need a new entry point for each of our flavors. It might be weird because we are used to only one app entry point, main.dart. Now we have three of them. In each of these new entry points, we are setting the static field appFlavor of the F class to the desired flavor.
import 'package:flutter/material.dart';
import 'app.dart';
import 'flavors.dart';

void main() {
  F.appFlavor = Flavor.DEVELOPMENT;
  runApp(MyApp());
}
For example, here in main-development.dart we are settingFto Flavor.DEVELOPMENT. This is what tells the app, "hey, please use the integration flavor this time."
Finally, we are calling the runApp function with a MyApp object instance. Note that by default it creates an App widget. This isn't the entry point widget we want. Indeed, this is a dummy widget, created byflutter_flavorizr. We need to replace this.
app.dart
This is the place where we place the root widget. We are just going to replace everything inside that file with the content of the main.dart file.
There is also a
home.dartfile that is generated. You can delete it safely. You can also delete themain.dartfile which is no longer useful.
result
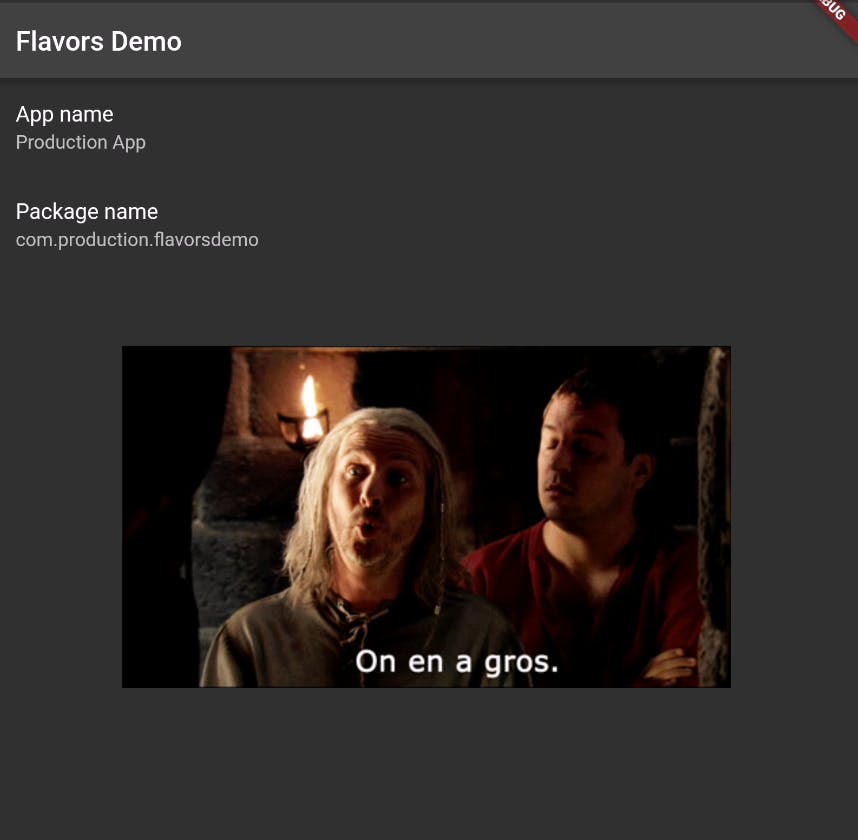
Now we can run our 3 different flavors, the result look like this:
development flavor

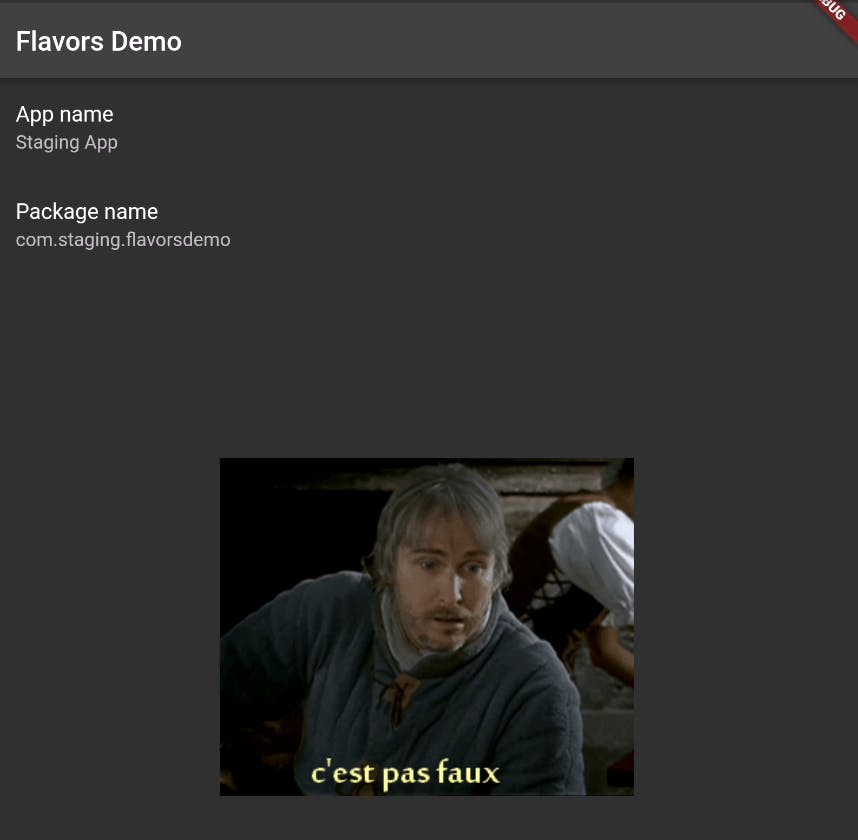
staging flavor
production flavor
Flavor update
The next time you want to update your flavors, you don't want to redo everything. For this, you can run a specific processor. A processor is a specific task done byflutter_flavorizr. For example, maybe you don't want to override your dart file or recreate your app icon. For this, use the following syntax flutter pub run flutter_flavorizr -p <processor>. For example
flutter pub run flutter_flavorizr -p android:buildGradle,android:androidManifest,ios:xcconfig,ios:buildTargets,ios:schema,ios:plist
If you want to update only Android and iOS without the icon generation.
YOU MUST AVOID ANY SPACE BETWEEN EACH PROCESSOR BECAUSE IT WILL NOT WORK.
You do -p <processor1>,<processor2> but don't -p <processor1>, <processor2>
The full list of processors can be found here
Configure VsCode
Have you noticed this line in our flavors' config ?
ide: "vscode"
This tells flutter_flavorizr to configure your IDE, in our case VsCode. You can also set the value to idea if you use Android Studio.
Now in the debug panel of VsCode, you can see this

With this you can run each of your flavors in every flutter mode (debug, profile, release).
This is really neat, let's see how it works.
The classic way to run a Flutter app is flutter run. However this command assumes that you have a file named main.dart as the app entry point and no flavor configuration. To run one of our flavors, we need to do flutter run --flavor <flavor> -t lib/main-<flavor>.dart. So, to run or staging flavor flutter run --flavor -lib/main-staging.dart.
The --flavor argument specifies which flavor build config it should use. The -t argument specifies the entry point file.
Now, to run a flutter in a specific flutter mode use the flag --<flutter-mode>. So to run our production flavor in profile mode we do flutter run --profile --flavor production -t lib/main-production.dart
The debug mode is the default mode
All this stuff is already done inside the .vscode/launch.json (created by flutter_flavorizr).
Now, if we have an issue with the staging app, we can just run our app with the staging flavor in debug mode from VsCode!
CI/CD
With these well-configured flavors, the CI/CD is also simplified. To demonstrate how we can make our CI/CD job easier, let's create a Jenkinsfile.
The goal of this article isn't to explain how Jenkins works, so I will not speak in deep detail about how it works
We will accomplish the following things:
- run a
flutter doctorcommand - build a .ipa file for iOS
- build an app bundle for Android
- create artifacts from these build files
Here is the Jenkinsfile:
#!/usr/bin/groovy
def appName = "Flavor Demo"

node('someNode') {
    withEnv(["PATH=path-to-a-flutter-bin:$PATH"]) {
        def flavorName = env.BRANCH_NAME;

        if (flavorName == 'development' || flavorName == 'recette' || flavorName == 'production') {
            def appNameAndroid = appName + "-${flavorName}-" + env.BUILD_NUMBER + ".aab";
            def appNameiOS = appName + "-${flavorName}-" + env.BUILD_NUMBER + ".ipa";
            def exportPlistFile = "./ios/exportOptions.${flavorName}.plist"

            stage('flutter doctor') {
                sh "flutter doctor"
            }

            stage("Build AAB Flutter Android for flavor ${flavorName}") {
                sh "mkdir -p build_ci"
                sh """
                    flutter build appbundle --release --flavor ${flavorName} -t lib/main-${flavorName}.dart
                    cp -pr build/app/outputs/bundle/${flavorName}Release/app-${flavorName}-release.aab build_ci/flutter_app.aab
                """
            }

            stage("Build IPA Flutter iOS for flavor ${flavorName}") {
                sh "mkdir -p build_ci"
                sh """
                    export LANG=en_US.UTF-8
                    flutter build ipa --release --flavor ${flavorName} -t lib/main-${flavorName}.dart
                    xcodebuild -exportArchive -archivePath ./build/ios/archive/Runner.xcarchive -exportOptionsPlist ${exportPlistFile} -exportPath flutter_app_ios
                    mv flutter_app_ios/*.ipa ./build_ci/flutter_app.ipa
                """
            }

            stage('Creating Artifacts') {
                dir("build_ci") {
                    sh "mv flutter_app.aab ${appNameAndroid}"
                    sh "mv flutter_app.ipa ${appNameiOS}"

                    archiveArtifacts allowEmptyArchive: true, artifacts: appNameAndroid
                    archiveArtifacts allowEmptyArchive: true, artifacts: appNameiOS
                }
            }
        }
    }
}
You need to create one export.plist file for each flavor.
As you can see, we are doing the exact same thing, just with different parameters.
In this case, we are assuming that each flavors have a specific git branch. This is really useful because we know what flavor we want to process based on the branch name.
We just have to define 4 variables.
Just like with the flutter run command, we are using the -t and the --flavor to build a specific flavor.
Conclusion
What did we do?
We have created 3 different flavors for our app, configured our IDE to take full advantage of our flavors and finally, we demonstrated how we can make our CI/CD easier.
It was not that hard. In real projects, I usually get some issues with the iOS configuration. You might spend some time debugging the configuration in Xcode. It's still better than creating it from scratch.
flutter_flavorizr is currently only working on Android and iOS. Hopefully it will handle desktop as well in the future.
You can find the demo app on github